Phase I - The Idea and the sketch
Phase II - The Blueprint and the Model
Phase III - The Treehouse Structure
Things have gone well so far...
The roof framing for a hexagon was a challenge. A center plug with twelve sides was first cut. This would give each rafter a solid point for attachment. With any roof load pushs out on the side walls. Cables were attached to opposite rafters. This put the cables in tension and help take the outward thrust forces off the walls.Looking up. Just for fun!
The placement of the hoist was another "shoehorn" type of deal. With little to no room to spare the location is perfect. Not to high so that the safety stop allowed the top of the elevator to hit the edge of the roof.
Half the roof done, so far so good. But, thinking about sheeting the roof. Now if you have ever done this you know that climbing up on a ladder and getting on to a roof is one thing. Stepping off a roof onto a ladder is another kind of feeling. Now since there will be no 40 foot ladder from the ground to the roof this made me pause a moment... or two.
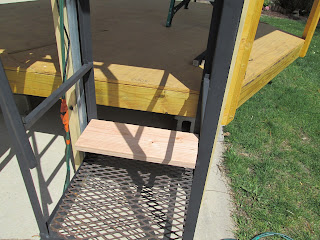
Oh, almost forgot the step in the elevator. Also have installed the safety cross bars. The two on the inside and outside are removable to allow entry and exit from the elevator.
These last two photos are just to keep you thinking. Did you see these parts in the pictures? Can you figure out what they are for or where these parts will go? It's all about strength and assembly.
Now it will be on to Phase IV - Building the support structure for the Treehouse into the tree limbs.


No comments:
Post a Comment