Wednesday, April 28, 2021

Phase III of Treehouse project complete


Phase I - The Idea and the sketch

Phase II - The Blueprint and the Model

Phase III - The Treehouse Structure

Things have gone well so far...

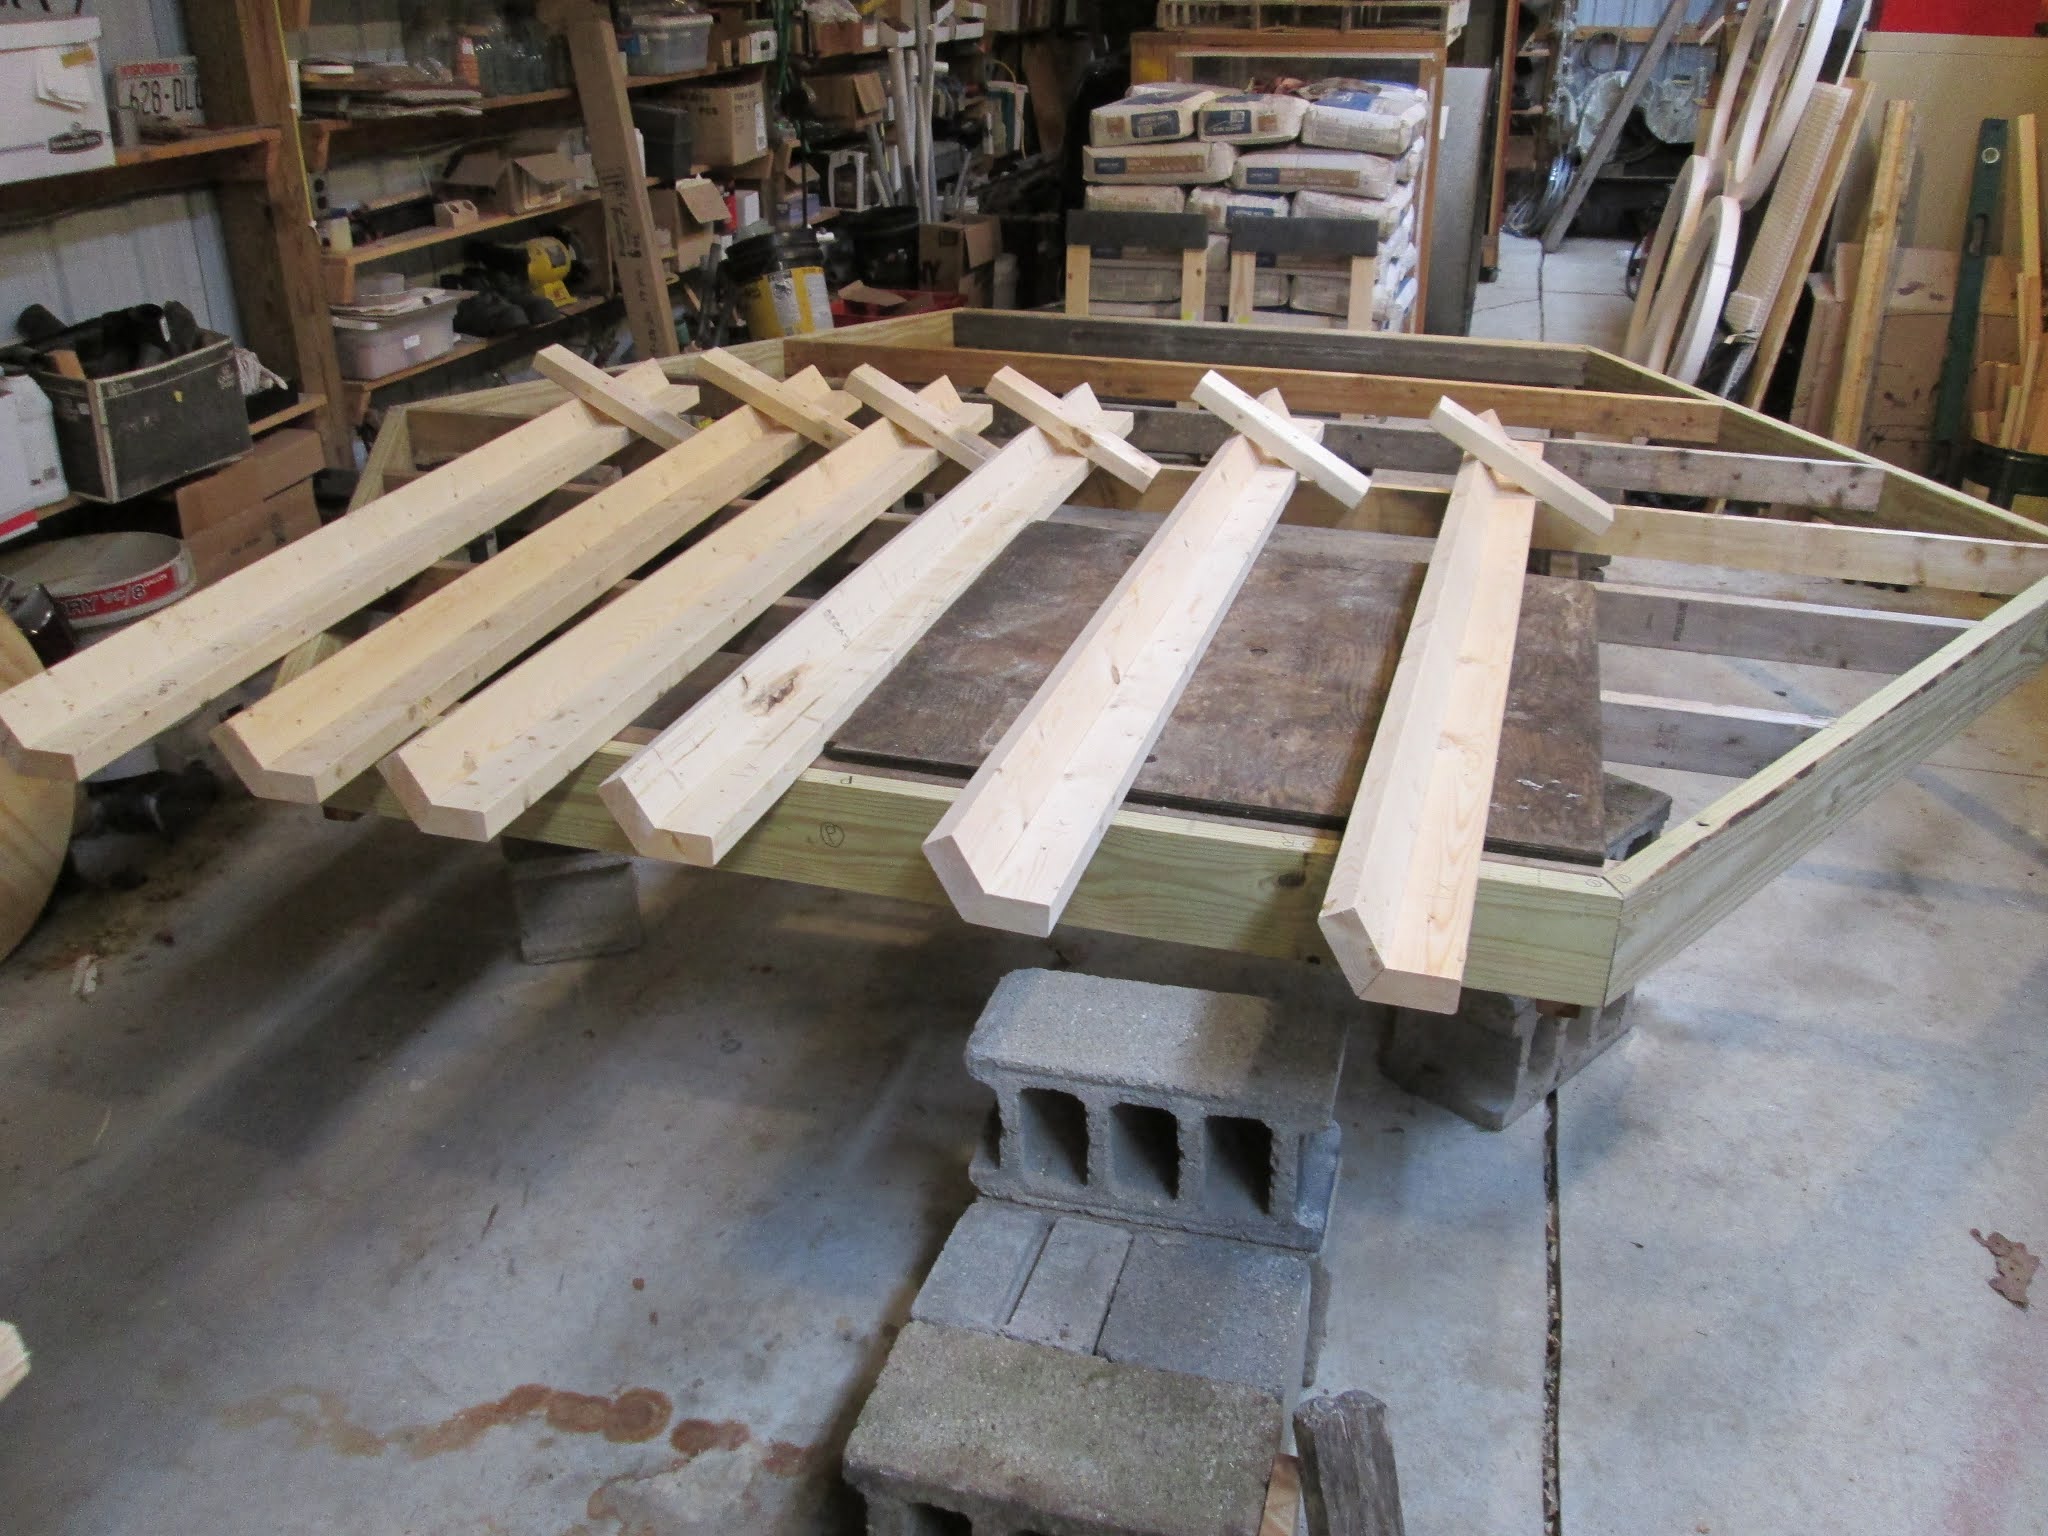
The roof framing for a hexagon was a challenge. A center plug with twelve sides was first cut. This would give each rafter a solid point for attachment. With any roof load pushs out on the side walls. Cables were attached to opposite rafters. This put the cables in tension and help take the outward thrust forces off the walls.

Picture of roof frame from above with the rafter framing done.

Looking up. Just for fun!


Replacing the temporary 2x4 blocks holding the rollers with some steel that can be bolted to the elevator cage.

The placement of the hoist was another "shoehorn" type of deal. With little to no room to spare the location is perfect. Not to high so that the safety stop allowed the top of the elevator to hit the edge of the roof. 

With 48" sides on the perimeter of the hexagon and a 8' main rafter length a full sheet of OSB sheathing could be cut on the diagonal and cover one sixth of the roof. How lucky was I that it worked out this way (just like I planned it, right?)

Half the roof done, so far so good. But, thinking about sheeting the roof. Now if you have ever done this you know that climbing up on a ladder and getting on to a roof is one thing. Stepping off a roof onto a ladder is another kind of feeling. Now since there will be no 40 foot ladder from the ground to the roof this made me pause a moment... or two.

Ah the solution would be a hatch door in the roof. This required a bit of construction but will do the job nicely. It also provided the extra height I needed to get the hoist in place and if I ever needed to service the hoist I could get at it. The roof vent will also be placed within reach of the hatch opening should there ever be a leak there. Now the next task will be to layout the 15' by 25' rubber membrane to make everything weather proof.

Oh, almost forgot the step in the elevator. Also have installed the safety cross bars. The two on the inside and outside are removable to allow entry and exit from the elevator.


These last two photos are just to keep you thinking. Did you see these parts in the pictures? Can you figure out what they are for or where these parts will go? It's all about strength and assembly.

Now it will be on to Phase IV - Building the support structure for the Treehouse into the tree limbs.


Wednesday, April 21, 2021

Build an Airplane in your basement. Who does that?


It was not supposed to go this way. I had "planned" to do all the construction in my pole shed but the shed roof trusses were in the way of the Treehouse roof rafters. So I was left with no choice but to move it out. Would it go through the garage door opening? The thought brought back a memory of articles read long ago where someone had built an airplane in their basement only to realize that there was no way to get the finished plane out. Would I be suffering a similar fate?

As they say, "One more coat of paint and it would not have fit through the door." With a little bit of effort and manually raising the door it slipped through. My lucky day. Since it will now be outside for the rest of the construction I decided to give it a coat of finish. Now I can get to work on the elevator.


1 - 1/2" by 1/8" angle iron would make up the frame. The cage would be 24" square and 6' - 6" tall.
Just like the windows drove the size of the hexagon the elevator and hoist drive the roof design. So having the elevator cage made up will help in designing the roof line and hoist placement.

So this went better than I imagined. Two 2x6's are attached on edge to the hexagon post on the right. This is a temporary set-up just to test the proof of concept. The real ones will have a 2x4 stiffeners screwed to the back side forming a T for strength. Two pieces of garage door track are screwed to each 2x6. Garage door rollers are placed at the top and bottom of the cage. The hoist is squeezed into the soffit area just above the door. With 5 foot windows, and using one of them as a door there is a challenge in getting head clearance. This is solved by the elevator stopping 16 inches below the floor of the Treehouse. You can see the cement block in the bottom of the elevator. This represents the "step up" to get into the 5 foot high opening to the Treehouse. Likewise when exiting the Treehouse you step down and your head clears the top header. It works like a charm. Unless you are over 6 feet tall!

Here is a look at it from the inside. The top of the elevator stops at the bottom of the header. On exit you step down 6" to get into the elevator and avoid a "header". A recoil with inertia safety cable will be attached to the elevator frame and roof rafter as a fail safe should the cable snap. 

So next it will be on to finishing up the roof rafter attachments and placing some cable ties to strengthen up the roof system to hold the load of the roof sheathing. Tricky but doable.


Thursday, April 15, 2021

Treehouse main frame complete


So with some head scratching I came up with this orientation for the 3/4 BCX flooring. Going this way minimized the scrap and only left two areas that I need to reinforce with 2x4 back-up pieces. 

Turned out nice. All pieces are numbered as to the corner post they are on for easy reassembly.

The posts were re-installed with the change in the way the top 2x12 was placed. Before there was a 2x4 held with pocket screws placed between the posts. This was needed to provide wood for the top nail flange of the window. The top 2x12 was then lapped inside each post. This sandwiched the window flange. Bad design. The new design called for the top 2x12 to be butt between the posts. A nail plate was screwed to the inside and this worked well.


And there you have it. Weighing in at 995 pounds of main frame. Now I will go to work building the elevator frame. With elevator frame I can better gauge the pitch of the roof to get the overhang that will work best to handle the winch placement.


Sunday, April 11, 2021

First Steps on Treehouse Project


 Another model that I made was of the window framing detail. The design is made so that the windows can be installed from the inside of the Treehouse. This is trickier that is sounds as the nailing flange around the window has to be on the inside of the frame on the top and two sides.

The windows are most important and drive the size of the Treehouse as they are a fixed size that require a 59 - 1/2" by 59 - 1/2" rough opening to the corner pieces as seen in the model. Since these are windows and are only made with a single sliding half on the left. I solved this problem by mounting the window inside out. Another consideration is that this 60 " size means that getting in and out could be a problem. 

The elevator will be 6 - 3" tall and the bottom will stop 18" below the floor of the Treehouse. As you can see in the picture I wanted to see how this would work when getting into and exiting the Treehouse. With an 8" step in the elevator it will be no problem. This will become clear as construction continues over the next few weeks.

The plan is to pre-cut, assemble and number the parts of the entire Treehouse and elevator system in my shed.  #9 GRK screws will be used in the pre-assembly and 1/4" GRK screws will be used for the final assembly in the tree. This will be the floor system. It will be covered with 3/4 CDX plywood.


A 30 degree angle was ripped on 2 x 4's that would form the 6 corners of the hexagon. These posts were cut long so they would cover the 2 x 6 bottom and 2 x 12 top rim of the hexagon. The 2 x 4 cross piece is a temporary stop to hold the 2 x 12 while being installed and fastened.


Special care needed to be taken when installing the screws so that the 3" screws would do their job. Hold fast and not stick through. This jig helped guid the drill for the pilot holes.

Corner number 1 from the inside.


One down five to go! There will be 4 screws in the bottom and 6 screws in the top of each post.

OK looks like the system will work as planned. Next up will be to install the 3/4" plywood deck and then finish up the posts and top rim. Total weight so far is 320 pounds.


Saturday, April 3, 2021

What do you SEE in this picture?


Well the question is, "What do you see ?" Many people will say a small cabin with a red roof. A dead tree with the top gone out of it. But that's just what IS in the picture. If you use your imagination in situations like this...


You may come up with an answer like this. I treehouse. Glass all around and an elevator to take you to the top. Like the Seattle Space Needle. Wow! A lot more exciting. I have spent several hours modeling the Treehouse Project to get some in-depth design details worked out before I launch into drawing the measured plans for the different parts and sub-parts. First up the Elevator.


Elevator - 2' by 2' by 6' tall unit.

    Main vertical/guide supports
    Anchoring of vertical/guide supports
    Garage door track rails
    Elevator box
    Electric Hoisting mechanism and controls
    Safety fall safe cable


Main platform support structor

    Attach lower 2 by 8 rough sawn oak planks notched into tree limbs
    Install socket and guide tube for main pipe safety harness anchor point
    Attach safety line and harness slide for work
    Second level of 2 by 8 oak plank and diagonal bracing to tree trunk
    Assembly of vertical elevator supports and track rails
    Attachment of vertical supports to second level oak planks
    Placement of temporary base mount for electric hoist on top of vertical 
    Install elevator box with fall safe retractable cable

So this will be a good start to this project. It will keep me busy while I wait for the logs to dry out before it get back to the cabin and do the chinking to finish it off.

Other sub-parts of the Treehouse Project that will be the subject of future posts.

FLOOR FRAMING
MAIN SUPPORTS AND RIM JOISTS
WINDOW INSTALLATION
ROOF  FRAMING AND RIM
ROOF SEATHING
ROOF MEMBRANE