The weather has turned cool but the rain held off and with the help of a lift truck we made short work of resetting the roof trusses on the cabin walls. After bracing them up the perlins were pegged to them and the roof framing was done.
Tight quarters to work in with the horse barn on the left, cottage on the right and fence in back.
After lifting the truss the EM seal had to be applied.
Not a bad couple of days work for three guys. All things considered the reassembly went as planned.
With a tarp on to keep out any rain we now wait for the roof boards. Twelve foot long 2x6's tongue and groove pine planking will be laid from ridge to eave for the roof. Then 2" of Styrofoam insulation and steel roofing to finish it off before the snow!
The 21st Century learning experiences gained as the community, school and businesses design, plan and build a 32 foot long Town Lattice Truss covered bridge for the Village of South Wayne, Wisconsin.
Sunday, October 25, 2015
Saturday, October 10, 2015
Let the re-assembly begin
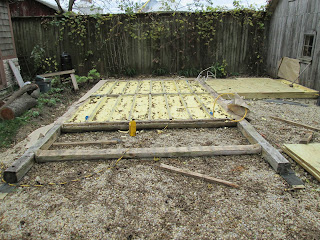
The cabin site has been leveled and prepared with several inches of 3/4" clear stone. Treated 6x6's were laid in for the untreated pine pine rim joists to sit upon. a strip of asphalt starter shingle was placed between them as a moisture barrier. Then foam insulation was sprayed between and below the floor joists to seal it off from any ground moisture.
This is what happens when a good idea goes bad! No one thought to fasten the floor joists down so when the foam expanded it raised some of them up. Bummer. However, it did give me a chance to use the adz that I purchased several months ago.
Leveling the floor joists set us back a few hours. After cutting the 3/4" treated plywood a strip of EM seal was placed around the perimeter to make a good seal between the plywood and the rim joists.
Work could now begin on laying up the log walls. Two strips of EM seal was applied to the bottom of these logs before they were put into place. You can also see the bat of fiberglass insulation that is placed on the corner. This will be done for each saddle corner to insulate and seal it.
Each succeeding round of logs will get two strips of EM seal applied to the coped groove. The EM seal starts out compressed and can expand up to 3/4" to seal and fill any gaps in the log joints. This makes for a very good seal and needs no maintenance.
The start is good and ship shape. Pretty good for a half days work. As more logs go up holes will need to be drilled where windows and doors go for the pegs that will knit the walls together there.
Subscribe to:
Comments (Atom)


