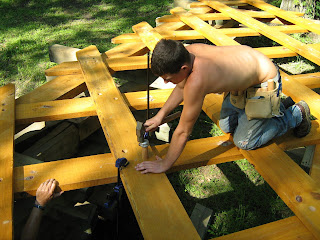
The re-assembly of the first truss went very well. Alex and Tom brought the team to three and I think we will be able to re-assemble truss #2 in one day if we get some help hauling the parts from the COOP to the site.
Everyone was fresh and and the pegs really flew. Tom did the support work from below. Alex ran the hammer and I handed him pegs and tried to plan out the placement of the pegs radiating out from the center of the Web and jack or pull the pieces into alignment.
Remembering to grease the holes so that the shorter pins could be easily pushed out as more layers and longer pins were added was tricky but the greaser head tool did the job well.
You can see that a considerable amount of force is needed to drive in the pegs. With each blow the peg goes in 3/4" to 1" but the first driving cap really took a beating and had to be replaced. The dome of the 1.25" pipe cap works nicely to protect the chamfered head of the peg but became concave in the process. I think I will be welding a 1/4" disc of steel to the top and welding it around the circumference. This will help spread out the force of the hammer blows. We'll see how it works on truss #2.
And there you have it. Pretty as a picture, Town truss #1 for the South Wayne Community Bridge Project re-assembled in place on the abutments and ready for rigging and then raising this Saturday.
Puzzler - How will we safely and easily raise the two 25' electric poles that will be used to raise this truss?
Tech Vocab - Driving Cap, Movable Pulley, Anchor Point, P/Sq In, Lifting Yokes


No comments:
Post a Comment