Monday, December 14, 2015

Closing in the Cabin

Cabin owner Tim, on the roof. You can see 2" foam sheet on top of the 2x6 tongue and groove roof boards. The tin sheets are screwed down to make a nice roof sandwich.

Finished roof all trimmed out and connected to the existing cabin to the right.


Lucked out on the weather for this project for sure. This is December!

 Detail showing the nice fit of the boards to the logs in the passage between the two cabins.

Windows trimmed out in the cabin. Three inches of space was left above each window frame for log shrinkage.

Sofit boards in place but need to be trimmed out on end along roof perlin. This overhang is all storage /loft space.

The cabin for the mother-in-law is located just across the yard from the main house. A bit more finish work and she should be able to move in by the new year.


Monday, November 9, 2015

Cutting cabin windows

With some 2x4 guide pieces screwed in place the ends of the gable logs were trimmed to be flush with the roof plane. Two strips of EM Seal was ran from peak to eave and the first roof board nailed in place.

This makes a well sealed and good looking ceiling. The 2x6 tongue and groove roof boards will be covered with 2" of styrofoam insulation and then the metal roof to finish it off.

Roof is on and time to cut in the windows.

This requires a 2x6 frame to be built and fastened to the cabin wall. This will be used as a guide for the saw to get the rough opening just right. A 2x12 frame will be built for each window and a 3" gap will be left at the top for log shrinkage. After the first heating season everything can be secured in place and the window trims installed.


Two windows on the side, and two in the front. The door was originally in the front but was moved to the side so the cabin could be connected to the existing cottage.


Sunday, October 25, 2015

Cabin reassembled

The weather has turned cool but the rain held off and with the help of a lift truck we made short work of resetting the roof trusses on the cabin walls. After bracing them up the perlins were pegged to them and the roof framing was done.
Tight quarters to work in with the horse barn on the left, cottage on the right and fence in back.

After lifting the truss the EM seal had to be applied.

Not a bad couple of days work for three guys. All things considered the reassembly went as planned.

With a tarp on to keep out any rain we now wait for the roof boards. Twelve foot long  2x6's tongue and groove pine planking will be laid from ridge to eave for the roof. Then 2" of Styrofoam insulation and steel roofing to finish it off before the snow!


Saturday, October 10, 2015

Let the re-assembly begin

The cabin site has been leveled and prepared with several inches of 3/4" clear stone. Treated 6x6's were laid in for the untreated pine pine rim joists to sit upon. a strip of asphalt starter shingle was placed between them as a moisture barrier.  Then foam insulation was sprayed between and below the floor joists to seal it off from any ground moisture.

This is what happens when a good idea goes bad! No one thought to fasten the floor joists down so when the foam expanded it raised some of them up. Bummer. However, it did give me a chance to use the adz that I purchased several months ago.

Leveling the floor joists set us back a few hours. After cutting the 3/4" treated plywood a strip of EM seal was placed around the perimeter to make a good seal between the plywood and the rim joists.

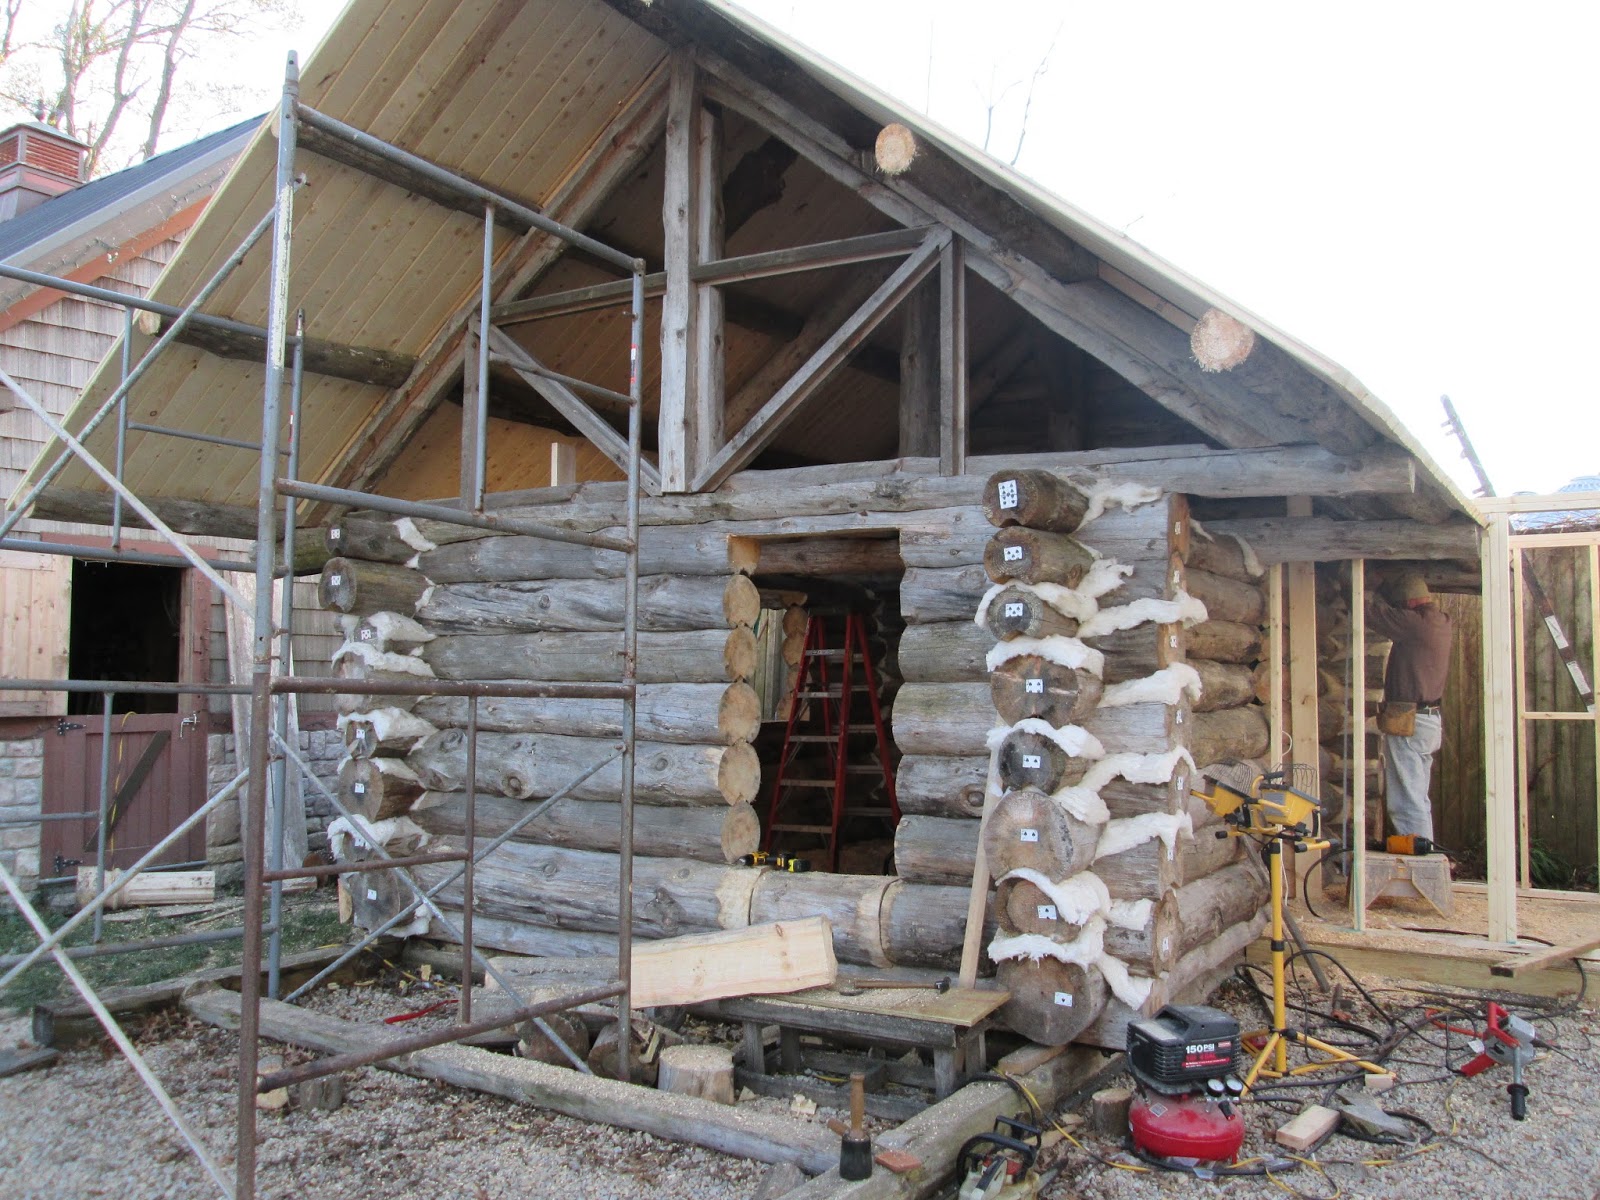
Work could now begin on laying up the log walls. Two strips of EM seal was applied to the bottom of these logs before they were put into place. You can also see the bat of fiberglass insulation that is placed on the corner. This will be done for each saddle corner to insulate and seal it.

Each succeeding round of logs will get two strips of EM seal applied to the coped groove. The EM seal starts out compressed and can expand up to 3/4" to seal and fill any gaps in the log joints. This makes for a very good seal and needs no maintenance.

The start is good and ship shape. Pretty good for a half days work. As more logs go up holes will need to be drilled where windows and doors go for the pegs that will knit the walls together there.


Monday, September 14, 2015

New site for cabin

The cabin will be re-assembled right between these two structures. The horse barn is on the left and cottage to the right.

The area has been leveled and a pad of 3/4" clear stone brought in to bring the area up to grade. The cabin will be connected to the cottage by a covered walkway. Six by six treated timbers have been placed into the gravel and the cabin floor rim joists will be placed on these. A layer of asphalt shingle  starter roll will separate the the rim joist from the treated 6x6's and 2" of the gravel will be raked away from the outside edge to provide good air flow and avoid any future moisture problems.


Sleepers and rails were laid down to rack up the trusses and logs. Another Bobcat made the work easier and faster.

Trusses, wall logs and floor parts were racked and staged such that they are out of the way and in a first needed first available manner. This should minimize the amount of handling in the re-assembly process that should begin in a week or two.


Sunday, September 13, 2015

Cabin walls down

With the roof trusses and perlins down it was time to start on the log walls. You can see the playing cards stapled to the ends of each log. These will be crucial to making a smooth re-assembly of the logs. All members of the team have been informed that removing any playing card is a hanging offense!

The logs will be picked by a set of log tongs and Bobcat. This worked great!


Another step along the way was to mark the log location at the notch with a wire fence staple. This was done to insure exact replacement when re-assembling.

Also on the wall just behind Cara you can see a yellow paint stripe. This marks the center location of a window opening that will be cut into the wall after the cabin has been re-assembled. This is needed because as the wall logs are placed 7/8" diameter holes will be drilled into the logs and 3/4" wooden pegs will be inserted. These will pin the logs together but allow them to slip down as the logs dry and shrink.


The Bobcat is making short work of the walls of the cabin.


Taking up the floor and loading the short pieces on a second trailer was the last step.


And then the cabin was gone! Now we head off to Scale Mound to unload and stage the rafters, logs and other cabin parts so we can begin building a log cabin for real.


Saturday, September 12, 2015

Cabin disassembly

Well it has been a few months but the new cabin owners have their site prepared and are ready to disassemble the cabin and haul it to it's new home. Here you can see the trim pieces and door have been removed and the cabin has been made ready.

The first job will be to remove the roof perlins and trusses. This will require a nice trailer to place them on and a crane lift to pick them.  Check!


Not having done this before made this all a bit nerve racking.


But the drivers were highly skilled, took great care and made the job look easy.

The trusses would be next. At over 1,000 pounds each nerves were on edge again as the lift and move to the trailer were made.
 Once again the task was performed without error! Whew:-)

Two hours later and the roof load was secured and on it's way to Scales Mound. Then it would be back for the crew to tackle the walls and floor of the cabin. So far so good.


Sunday, July 12, 2015

Finished Hornet

 Small quantities of resin at a time is a must as the working time of it is short after the hardener is added.

The resin is painted on over the fiberglass mesh that was stapled to the Hornet. The resin will soak into the mesh and when hardened provide a water proof protection to the carving.

Now all Jim has to do is give the Hornet a good coating of paint and it will be ready for school to start!

New cabin owners want the door on the side so had to cut some filler logs to make this a window. Getting ready to disassemble and move the cabin at the end of July.


Have layed out and bored the mortise for the Jacobson cabin. Sue should be able to finish the rafters in a weekend and then start the foundation work at her site.

Other than that just been goofing off.